
 10:16:00 AM
 Angga_heaker

For additional information about installing computer memory into your computer system, it is recommended that you read
any user manuals that came with your computer for specific procedures
that may be required. For more information for purchasing memory upgrades
for a computer, please refer to the Before You Buy Memory upgrades
article.
- Turn off the computer and remove all power cords from the computer system.
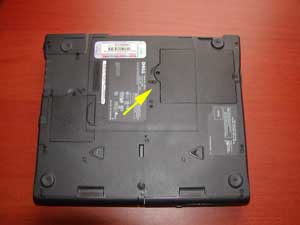
- Locate the panel used for access to the memory modules. This is
generally located on the bottom of the laptop computer. Refer to
your laptop instruction manuals for locating the panel.
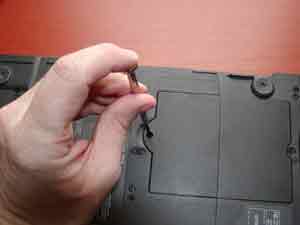
- Remove any screws that the panel in place and place somewhere
safe to prevent losing it.
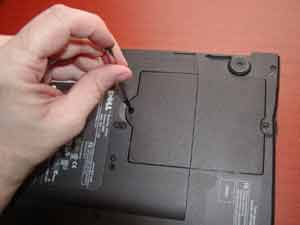
- Remove the panel from the laptop and set aside.
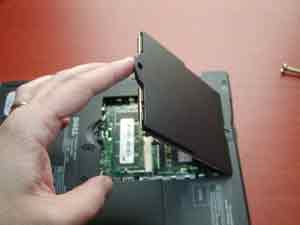
- If replacing or upgrading an existing memory module, remove the
memory modules by undoing and module clamps and gently lifting the
edge of the module to a 45-degree angle and then pulling the module
out of the slot.
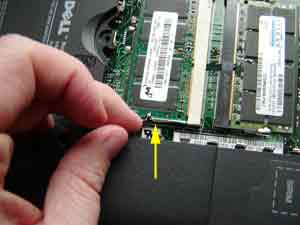
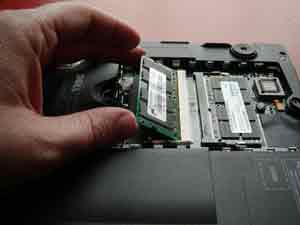
- Align the notch of the memory module with that of the memory slot
and gently insert the module into the slot at a 45-degree angle.
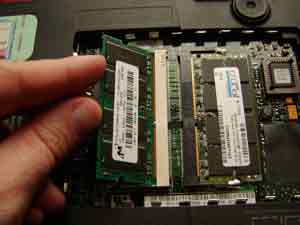
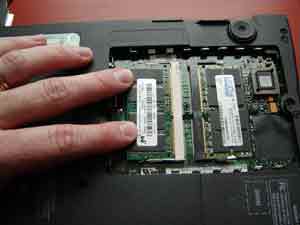
- Once all the pins are in the slot, gently rotate the module down
flat until the clamps lock into the module into place.
- Replace the memory access panel onto the laptop computer.
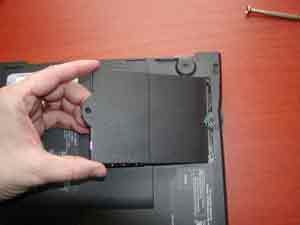
- Replace any screws or fasteners that hold the panel in place.
- Replace the power cord and power up your computer system.
 Posted in: Trick


0 comments:
Post a Comment